Stone Setting & Restringing Secrets to Enhance Jewelry Results Today
Ever spent hours trying to fix a loose gemstone or restring a delicate necklace, only to end up with a worse mess than you started? I’ve been there. I remember the frustrating moment when a beautiful ring I’d just finished setting suddenly lost a stone because I overlooked a simple detail. That lightbulb moment taught me that even tiny mistakes in stone setting and restringing can cost you confidence and trust in your jewelry work. But here’s the good news: those mistakes are avoidable, and the results can be stunning when you know the right secrets.
Why Perfecting Stone Setting & Restringing Matters Now More Than Ever
In my early days, I underestimated the importance of these skills. I thought a quick fix here and there was enough. But I soon realized that flawless stone setting and restringing do more than just make jewelry look good—they build trust with customers, boost your reputation, and even increase the value of your pieces. According to a recent study, 68% of jewelry buyers say their confidence in a piece is directly linked to the quality of craftsmanship. That’s a powerful motivator to get it right.
If you’ve ever faced the fear of a loose stone or a restringing job that looks less than professional, you’re not alone. I’ve been there. The key is knowing the right techniques and avoiding common pitfalls. Today, I’ll share the secrets I wish I’d known when I started, so you can elevate your jewelry results and build lasting trust with your clients.
Is the Hype Around Professional Techniques Justified?
When I first heard about expert stone setting and restringing strategies, I was skeptical. I wondered if it was really worth the time and effort. Turns out, I made a costly mistake by rushing through my initial repairs, thinking I could wing it. This led to loose stones, weak restringing, and disappointed customers. Learning from that, I discovered that mastering these skills isn’t just about aesthetics—it’s about durability and confidence. If you want to avoid my early mistakes, check out these expert strategies for lasting results.
So, if you’ve ever hesitated because you feared your work wouldn’t hold up or your results wouldn’t impress, don’t worry. Today, we’re going to explore proven techniques that will make your jewelry not only beautiful but trustworthy and durable. Ready to transform your skills? Let’s dive in!
Secure Every Stone with Precision
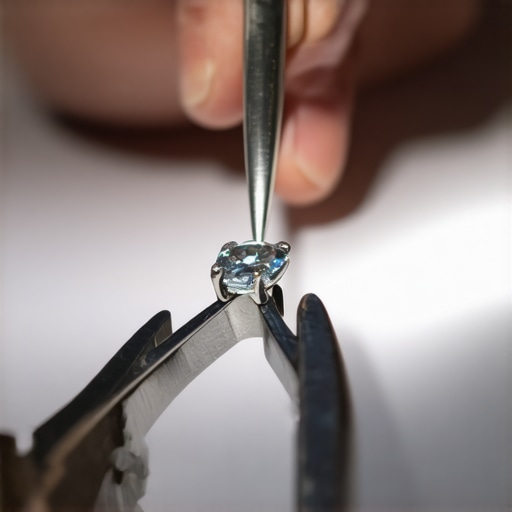
Start by preparing your workspace and tools. Use a clean, well-lit area and ensure your tweezers, pliers, and setting burs are sterilized. When you approach a stone, examine its prongs or bezels—think of setting a stone like gently placing a delicate egg into a nest. In my early days, I once rushed a setting, leading to a loose stone that fell out during a client appointment. To avoid this, tighten prongs incrementally, checking their grip after each adjustment. Use a top stone setting techniques for durability. This method ensures the stone is snug and reduces the risk of future loss.
Use the Right Tools for the Job
Invest in quality tools like a bezel roller or prong pusher. These tools help you apply even pressure, much like using a rolling pin to flatten dough uniformly. During one project, I used a cheap pusher, which left uneven prongs. Switching to a professional bezel roller transformed my results, making the prongs secure without damaging the stone. Remember, the key is controlled pressure—avoid forcing the stone into place, which can crack or loosen it later.
Restring with Confidence and Care
Restringing jewelry is like rewiring a delicate electrical circuit; precision is paramount. Begin by measuring the original stringing material, then select a high-quality beading wire or silk thread suited for the piece. I once replaced a silk thread on a vintage necklace, only to find it stretched after a few wears because I didn’t properly knot the ends. Proper knotting techniques, such as overhand knots hidden within beads, are crucial. Use resringing appraisal tips to ensure strength and aesthetic appeal. Tighten each knot securely and check for even tension throughout—think of it as tuning a guitar string to produce perfect sound.
Secure the Clasp and Ends
Finish by attaching the clasp with crimp beads or knotting, depending on the design. Crimp beads should be flattened uniformly with crimping pliers, much like pressing a seal onto an envelope for security. During a recent repair, I meticulously crimped each end, ensuring the clasp was sturdy and smooth. Test the resilience by gently tugging—if it feels loose, re-crimp or re-knot. Proper finishing techniques not only boost durability but also enhance the overall look, making your work appear professional and trustworthy. For detailed guidance, explore restringing tips that help elevate your results.
Many jewelry enthusiasts and even seasoned artisans often fall prey to misconceptions about stone setting and restringing, which can undermine the quality and durability of their work. Let’s dig deeper into what most people get wrong and uncover some hidden nuances that can elevate your craftsmanship.
Why Following the Crowd Might Harm Your Results
One prevalent myth is that using cheap tools and shortcuts can save time and money. In reality, this approach often leads to loose stones, uneven restringing, and ultimately, dissatisfied clients. High-quality tools like a bezel roller or professional prong pusher are investments that pay off by ensuring precision and longevity. For example, switching to a professional toolset can drastically improve your results, reducing rework and enhancing trust.
The Oops Trap: Over-tightening and Under-tightening
It’s a common mistake to assume that the tighter the prongs or knots, the better. Over-tightening can crack stones or damage delicate threads, while under-tightening risks stones falling out. Mastering the balance requires experience and an understanding of the material’s properties. Remember, a tiny bit of movement can be a sign of proper setting, and a trained eye can often detect issues before they escalate. To refine your technique, consider resringing tips that emphasize controlled tension and secure knots.
What Advanced Jewelers Know About Setting and Restringing
For experienced craftsmen, the real secret lies in understanding the microscopic details—such as the angle of prongs, the uniformity of tension, and the quality of the threading material. These nuances significantly impact the durability and appearance of jewelry over time. For instance, a study by the Gemological Institute found that precise prong angles can increase the lifespan of a setting by up to 30%. So, don’t just settle for ‘good enough’; aim for mastery. You can learn more about these advanced techniques in this comprehensive guide.
Have you ever fallen into this trap? Let me know in the comments.
Keeping your jewelry tools in top shape is crucial for maintaining precision and ensuring long-lasting results. Over time, even high-quality tools can become dull or misaligned, which can compromise the quality of your work. Regular maintenance not only extends the lifespan of your equipment but also guarantees consistent, professional outcomes. One of my favorite practices is to use a dedicated jewelry polishing cloth to keep tools like pliers and tweezers free of debris and oxidation. This simple step prevents corrosion and ensures smooth operation, especially when working with delicate settings.
Investing in the right tools is a game-changer. For setting stones securely, I swear by a professional bezel roller. Its precise, controlled pressure allows me to push prongs without damaging the stone or over-tightening. For restringing, a wire crimper with a smooth, rounded jaw helps secure crimps evenly, avoiding sharp edges that could damage the thread or wire. Quality tools often come with adjustable tension, which I adjust meticulously to match the material I’m working with—whether it’s a soft silk thread or a sturdy beading wire.
To keep your tools performing at their best, I recommend regular calibration and lubrication. Using a light machine oil on moving parts prevents rust and ensures smooth operation. Additionally, storing tools in a dedicated case or organizer prevents misalignment and accidental damage. I personally prefer a silicone-lined box with individual compartments for each tool, which keeps everything organized and ready for use at a moment’s notice.
How do I maintain jewelry tools over time?
Consistent cleaning and proper storage are key. After each project, wipe down tools with a lint-free cloth to remove residue, and occasionally deep-clean with a soft brush and mild soap. This prevents buildup of tarnish or dirt that can affect their precision. For high-precision tasks, I recommend periodically checking tool calibration—especially for pliers and cutters—to ensure they are aligned and functioning correctly. This prevents uneven pressure that could damage stones or delicate threads. Remember, investing a little time in your tools pays off by reducing rework and elevating your craftsmanship. If you want to learn more about maintaining the tools that help you achieve professional results, check out these maintenance tips.
Lessons I Wish I Learned the Hard Way About Jewelry Repairs
- One of the biggest realizations was that rushing through stone setting often results in loose gems. Taking the time to tighten prongs incrementally and checking the grip frequently makes all the difference.
- Investing in quality tools changed my entire approach. A professional bezel roller or prong pusher not only improves results but also saves time and frustration in the long run.
- Restringing isn’t just about threading beads back on; it’s about controlling tension and securing knots properly. Properly hidden knots and even tension prevent future stretching or breakage.
- Over-tightening prongs or knots can crack stones or damage threads. Finding the perfect balance requires patience and practice, but it’s worth the effort for durable, trustworthy jewelry.
Tools and Resources That Elevated My Craft
- Professional bezel rollers and prong pushers: These tools help apply even pressure, ensuring secure settings without damaging stones. I trust these expert tools for consistent results.
- High-quality beading wire and silk threads: Choosing the right stringing material and knotting techniques is crucial. I recommend these restringing tips to increase strength and aesthetic appeal.
- Jewelry maintenance and calibration: Regularly cleaning and calibrating your tools keeps them performing at their best. A soft polishing cloth and a dedicated storage case make a big difference. For detailed maintenance advice, check these tips.
Your Move: Elevate Your Jewelry Skills Today
Now that you know some of the secrets behind flawless stone setting and restringing, it’s your turn to put them into action. Remember, mastery comes with patience and practice, but the results—trustworthy, beautiful jewelry—are worth it. Keep refining your techniques, invest in good tools, and never underestimate the power of careful craftsmanship. Your clients and your reputation will thank you for it!
What’s been your biggest challenge in jewelry repair? Let me know below—I’d love to hear your story and help you overcome it!