Mastering Stone Setting: Expert Techniques for Stunning Jewelry Results
Have you ever watched a jewelry piece fall apart right after you set a stone, feeling that sinking feeling of disappointment? I’ve been there. Early in my career, I thought I knew everything about stone setting—until I realized that a small mistake could ruin hours of work and cost me a lot in materials. That lightbulb moment made me dive deep into mastering the intricacies of expert techniques, and let me tell you, the difference is astonishing.
Why Perfecting Your Stone Setting Matters More Than Ever
In the world of jewelry making, craftsmanship isn’t just about beauty; it’s about trust. When your clients see a securely set stone, their confidence in your skill skyrockets. Conversely, a poorly set stone can damage your reputation faster than you can say “restringing.” Plus, with the rise of online reviews and social media, every piece you create is on display for the world to scrutinize. If you’re tired of fixing the same mistakes or losing sleep over a flawed setting, this post is for you. Today, I’ll walk you through proven techniques that elevate your craftsmanship and ensure each piece shines.
Is It Really Worth the Hype to Learn Advanced Setting Techniques?
Absolutely. I used to think that a basic bezel or prong setting was enough. But I realized early on that rushing through a setting without proper preparation was a costly mistake. I remember one project where I skipped a crucial step—testing the tension first—and the stone wobbled after a week. That taught me the importance of meticulous preparation and proper tools. If you’re skeptical, consider this: mastering these techniques can dramatically reduce repairs and boost your confidence, which directly translates into happier clients and more referrals. For more insights on building trust through your skills, check out this article on setting strategies.
Now, let’s get into the steps that will help you avoid common pitfalls and set stones with confidence and precision. Whether you’re just starting out or looking to refine your craft, these tips will make a noticeable difference in your results.
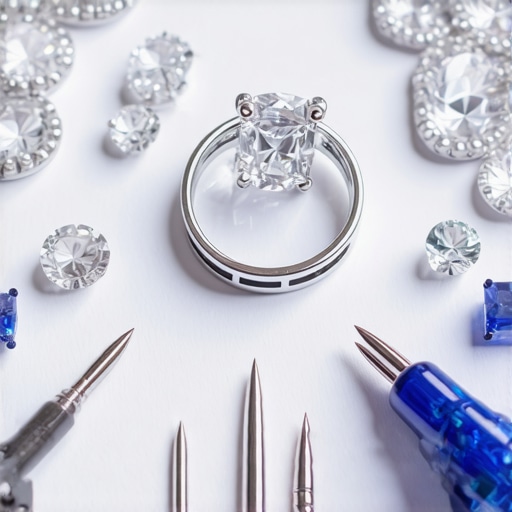
Secure Every Stone with Precision
Start by preparing your workspace and tools. Use a loupe to examine the stone and ensure it’s free of dirt and flaws. When you pick up the stone, imagine you’re delicately placing a tiny treasure into a safe haven—you want it to sit perfectly without wobbling. Apply a small amount of setting wax or adhesive if needed to hold the stone temporarily. Then, carefully position the stone in the setting, ensuring it aligns symmetrically with your design.
Once positioned, tighten the prongs or bezel with specialized pliers. Think of this step as gently tightening a nut onto a bolt—you want a firm grip, but not so tight that you risk damaging the stone. Use a staking set to gently press the prongs down, ensuring they grip the stone securely. Regularly test the stability by lightly tapping the setting with a plastic hammer. In my experience, a gentle tap can reveal loose stones that might otherwise fall out later. For detailed guidance, check out this article on setting strategies.
Check Tension Like a Pro
Before finalizing, test the tension of the setting. Imagine you’re tuning a musical instrument; proper tension ensures harmony and security. Use a tension gauge or gently wiggle the stone with your tweezers. If it wobbles, re-tighten the prongs or adjust the bezel. This step saves you from costly repairs down the line. I once missed this step on a sapphire, and it wobbled after a week—teaching me the importance of meticulous tension testing. Remember, consistency is key: look for even tension on all sides.
Shape and Finish for Flawless Results
After securing the stone, focus on shaping and finishing. Use a file to smooth out any rough edges or prongs. Think of this as polishing a mirror—you want every surface to be smooth and reflective. Use a polishing wheel or cloth to bring out the luster. Lastly, inspect the setting under magnification to catch any tiny imperfections. Proper finishing not only enhances beauty but also reassures clients of your craftsmanship. For more advanced finishing techniques, explore this resource.
Avoid Common Pitfalls
Stay alert for signs of over-tightening, which can crack delicate stones, or under-tightening, which leads to looseness. Always double-check your work before moving on. A good habit is to step back and view the piece from different angles, ensuring symmetry and security. Remember, patience and attention to detail are your best tools for mastery. With practice, setting stones becomes second nature, elevating your jewelry to professional standards.

Many jewelry professionals and hobbyists alike fall into traps when it comes to advanced techniques like stone setting, restringing, appraisal, and engraving. Let’s dig deeper into some hidden nuances and myths that could be holding you back from mastering these crafts. First, there’s a widespread belief that mastering basic methods is enough for professional results. In reality, the nuances of tension, prong angles, and finishing details differentiate a good piece from a stunning one. For example, many think that a quick setting is sufficient, but meticulous tension testing and prong shaping are what ensure lasting security and beauty.
Another common mistake involves the misconception that all stones require the same setting approach. Different gemstones have unique physical properties; softer stones like opals or pearls need gentler handling and specific settings to avoid damage. Over-tightening prongs on delicate stones can cause cracks or chips, which is a mistake often made when rushing through a project.
When it comes to restringing, many assume that simply restringing with the same type of thread or wire will suffice for durability. However, the choice of material, tension, and knot techniques all influence the longevity and safety of the jewelry. Using the wrong gauge or poor knotting techniques can lead to failures, especially in heirloom pieces. Check out this resource on restringing techniques to avoid these pitfalls.
Myth number three is that all appraisals are straightforward and only depend on the gemstone’s weight. In truth, accurate appraisal requires a nuanced understanding of factors like cut, clarity, provenance, and current market trends. Relying solely on weight can lead to undervaluing or overvaluing a piece. This guide on appraisal strategies provides insights into the complexities of valuation beyond just weight.
Finally, many believe engraving is a simple technique—just carve and finish. But the subtlety lies in understanding the right tools, pressure, and depth to avoid damaging the piece or creating uneven lines. Advanced engravers master the art of consistent depth and flow, which elevates their work from amateur to artisan.
If you want to elevate your skills, avoid these common traps, and truly understand the nuances, engaging with expert tips and detailed strategies is essential. Have you ever fallen into this trap? Let me know in the comments.
Keeping your jewelry tools in top condition is crucial for maintaining precision and quality in your work. I personally rely on a few specific tools that have become indispensable in my studio. For instance, a high-quality diamond-tipped burr set is essential for refining prongs and ensuring smooth edges. Unlike standard burrs, diamond-tipped options last longer and provide a cleaner finish, which is especially important when working with delicate settings. Additionally, I swear by a stainless-steel ultrasonic cleaner to remove dirt and residue from tools and jewelry pieces alike. Regular cleaning prevents buildup that can impair tool performance or compromise the integrity of your settings. To keep my files and polishing wheels effective, I use lubricants specifically designed for jewelry, which reduce wear and extend their lifespan.
When it comes to software, if you are involved in appraisal or design, professional appraisal software like GemCloud or MatrixGold can streamline your workflow. They help you accurately assess gemstone properties and visualize designs, saving time and reducing errors. As technology evolves, I predict a trend toward integrated digital tools that combine 3D modeling, augmented reality, and AI-powered diagnostics to elevate craftsmanship and accuracy even further.
How do I maintain my tools over time? Regular calibration and proper storage are key. For example, I store delicate prong pushers and pliers in a dedicated toolbox with foam inserts to prevent damage. I also set a schedule for monthly maintenance that includes cleaning, lubrication, and inspection for wear. This routine helps catch problems early, avoiding costly repairs later. Remember, investing time in proper maintenance pays off by ensuring consistent results and prolonging your tools’ lifespan.
One advanced tip I recommend trying is using a micro-torque wrench when tightening prongs or bezels. Unlike regular pliers, a torque wrench allows you to apply precise force, reducing the risk of over-tightening delicate stones. This technique is particularly beneficial when working with softer gemstones like opals or pearls, where even slight excess pressure can cause damage. Incorporate this tool into your workflow to achieve more consistent, reliable settings and elevate your craftsmanship.
In the future, I believe these tools will become smarter, possibly integrating IoT sensors that monitor wear and suggest maintenance schedules automatically. Stay ahead by adopting these innovations early and refining your techniques continually. For a comprehensive guide on maintaining your tools and ensuring lasting precision, check out this resource. Why not start today by testing one new maintenance practice or tool to see how it improves your results? Your future self will thank you!
Over the years, I’ve learned that the true mastery of stone setting, restringing, appraisal, and engraving lies in the little details that often go unnoticed. One of the hardest lessons I learned was to always question my assumptions—what I thought was enough often turned out to be just the surface. For example, I used to believe that a quick prong tighten was sufficient, but a single overlooked tension test could cause hours of rework. That lightbulb moment pushed me to adopt meticulous checks and refine my technique continually.
Another valuable insight was to respect the unique properties of each gemstone. Softer stones like opals require gentler handling, and rushing through a setting can cause irreversible damage. I also realized that tools are just as important as skills—using a micro-torque wrench can make a world of difference in achieving perfect tension without risking damage. These lessons taught me that craftsmanship is a constant journey of learning and adapting, and sharing these insights helps elevate the whole community.
For those seeking to deepen their skills, I highly recommend exploring resources like this comprehensive guide on setting strategies. It provides detailed techniques that have helped me avoid common pitfalls and achieve professional results every time. Remember, mastery isn’t about rushing; it’s about embracing each step and understanding the nuances that make a difference in your work.
By continuously refining your craft, investing in quality tools, and respecting the properties of each gemstone, you can turn jewelry making into an art form that inspires trust and admiration. The journey of mastering these techniques is ongoing, but every successful setting, every flawless finish, is a step closer to becoming the artisan you aspire to be.
The Hardest Lesson I Learned About stone setting,restringing,appraisal,engraving
- Patience beats speed every time. Rushing leads to mistakes, while taking your time ensures quality and trustworthiness.
- Every gemstone has a story—respect its physical properties and handle it accordingly. Soft stones demand gentler techniques.
- Tools are your allies—invest in precision instruments like micro-torque wrenches and diamond-tipped burrs to elevate your craftsmanship.
- Don’t underestimate the power of routine maintenance. Well-maintained tools produce better results and last longer.
- Continuous learning and curiosity are your best friends. There’s always a new technique or tool to discover that can transform your work.
My Essential Toolkit for Jewelry Craftsmanship
- Diamond-tipped burr set: Essential for refining prongs and ensuring smooth edges. I trust diamond-tipped tools for their durability and precision.
- Ultrasonic cleaner: Keeps my tools and jewelry pieces free of dirt and residue, which is vital for maintaining quality.
- Lubricants for jewelry tools: Reduce wear and extend the lifespan of files and polishing wheels, ensuring consistent results.
- Professional appraisal software: Tools like GemCloud help me assess gemstone properties accurately and streamline my workflow.
- Micro-torque wrench: Achieves precise tightening, especially useful for delicate stones like opals or pearls. It’s a game-changer in accuracy.
Your Turn to Try
Now is the perfect moment to put these insights into practice. Whether you’re adjusting your technique or upgrading your tools, each small step toward mastery builds confidence and trust in your craftsmanship. Remember, every piece you create is a reflection of your dedication and skill—so keep pushing your boundaries and refining your art. Are you ready to elevate your jewelry skills and turn every setting into a masterpiece? Share your experiences or questions below, and let’s learn together.