Stone Setting Mastery: Expert Tips for Stunning Jewelry in 2024.
Ever had that sinking feeling when a precious stone slips just as you’re about to finish a piece? I remember the first time I set a gemstone and watched it wobble—my heart sank. It was a lightbulb moment that I needed to master the art of stone setting beyond just the basics. Over the years, I’ve learned that perfecting this craft can turn good jewelry into stunning masterpieces, and I want to share that journey with you. If you’re tired of inconsistent settings or worried about your jewelry not lasting, you’re in the right place. Today, I’ll guide you through proven techniques and insider tips that will elevate your skills and give your jewelry that professional shine.
Why Pay Attention to Stone Setting Now?
In 2024, the jewelry world is more competitive than ever. Clients demand not just beauty but durability and trust in every piece. A poorly set stone can compromise the entire design, leading to costly repairs or, worse, lost stones. Moreover, with the rise of online jewelry sales and custom pieces, your reputation depends heavily on the quality of your craftsmanship. According to a recent industry report, jewelry with secure and precise settings retains value and trust far better than those that don’t. This is why honing your stone setting skills is not just about aesthetics—it’s about building confidence and credibility with every piece you craft or repair.
Have you ever faced a situation where a stone was loose, or worse, fell out after just a few weeks? That frustration is common among beginners and seasoned jewelers alike. I made a crucial mistake early on: rushing the setting process and ignoring the importance of proper tool use and technique. That mistake cost me more time and money than I’d like to admit. But it also taught me a valuable lesson: mastery comes from understanding the nuances of each setting style and applying them with care. If you want to avoid the pitfalls I faced, stay tuned. I’ll show you how to get it right the first time, every time.
Will These Tips Really Make a Difference?
Absolutely. It’s one thing to know the theory, but applying expert techniques transforms your results. Whether you’re setting a solitaire, pavé, or bezel, these methods will give your jewelry a professional finish. If you’re skeptical, I get it. I was too, at first. But once I adopted a few key practices, my success rate soared. For a deeper dive, check out this comprehensive guide that covers essential techniques for stunning jewelry. The goal is to help you craft pieces that not only look beautiful but also stand the test of time—because confidence in your craft is everything.
Ready to turn your jewelry from amateur to art? Let’s get started with the core principles that will elevate your stone setting skills in 2024 and beyond.
,
Secure the Stone with a Steady Hand
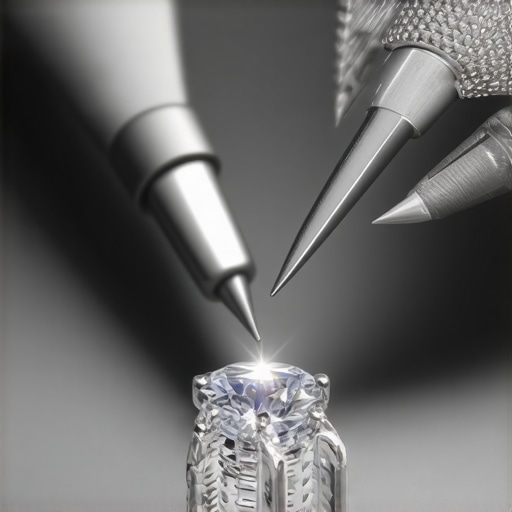
My first experience with setting a brilliant diamond was a lesson in patience. I clamped the stone lightly in tweezers, then used a bezel pusher to gently push the metal around the girdle. It’s like wrapping a gift carefully — too tight and you risk cracking the stone, too loose and it wobbles. To get it right, I practiced holding my tools steady, applying even pressure, and checking the alignment frequently. A good rule is to work in small, deliberate steps, gradually tightening the bezel until it snugly holds the stone without pinching. If the metal is too loose, the stone can shift or fall out, so aim for a firm but gentle hold. Remember, consistent pressure is key for perfect results. For detailed techniques, check out this comprehensive guide.

Precision with Prongs
Prong setting is like a claw clasping your treasure—firm but not aggressive. I once set a ruby in a four-prong basket for a custom ring. The trick was to bend each prong equally, ensuring the stone was centered and level. Using a prong pusher, I gently pushed each prong inward, then used a burnisher to smooth and secure them. The goal is to create an even tension around the stone, preventing any wobble. Be mindful not to over-bend, which can crack delicate stones. Practice by setting small, cheap stones first, aiming for uniformity in prong height and tightness. This step is fundamental for durability. For nuanced tips, explore this detailed resource.
Mastering Bezel Setting
Bezel setting is like giving your stone a custom-made collar. I once prepared a thin strip of gold, shaped it around an opal, and soldered the ends to form a perfect circle. When setting, I placed the stone on a flat surface, then carefully pressed the bezel wire around it. Using a burnisher, I worked my way around, pushing the metal tightly against the stone’s edge. The key is to keep the bezel’s height even and to avoid trapping air bubbles or gaps. For fragile stones, a thinner bezel offers a sleek look without risking damage. Practice shaping and soldering bezel wire before attempting full settings. For advanced techniques, see this guide.
Aligning and Leveling the Stones
Once the stone is held securely, I focus on alignment. Think of it like balancing a see-saw — if one side is higher, the whole piece feels off. I use a loupe and a pair of tweezers to check that the stone is perfectly centered and level. Sometimes, a slight adjustment with a prong or bezel burnisher is needed. For pavé or micro-setting, the alignment is crucial to ensure each tiny stone sits flush and uniform. I’ve found that taking a moment to double-check alignment before soldering or finishing saves time and rework later. For detailed alignment techniques, visit this detailed guide.
Final Security and Polishing
After setting, I inspect the piece under magnification to spot any loose prongs or gaps. A quick tap with a rubber mallet can sometimes seat the metal tighter. Then, I polish the finished piece with a soft cloth and a polishing wheel, removing any flux, fire stain, or tool marks. This final step reveals the true beauty of your work, like polishing a mirror. Remember, a secure setting isn’t just about appearance — it’s about trust and durability. Regularly practicing these core techniques will make every setting more precise and reliable. For comprehensive tips, check out this expert resource.
Many artisans and hobbyists approach stone setting, restringing, appraisal, and engraving with a set of assumptions that can actually hinder their progress. Let’s dig deeper into what most people get wrong and uncover some hidden nuances that can elevate your craft beyond the basics.
Why the Popular Belief That More Tension Is Better Can Backfire
A common myth is that tighter prongs or bezels always mean a more secure setting. While tension is important, excessive force can crack delicate stones or deform the metal, leading to costly repairs. In my experience, the key is balanced tension—enough to hold the stone firmly but without stress. Over-tightening can cause microfractures in stones like sapphires or emeralds, which are more prone to cracking under pressure. For expert guidance, check out this detailed resource.
The Oops Moment When Restringing Goes Wrong
Many overlook the importance of correct tension and knotting techniques when restringing jewelry. Using the wrong stringing material or neglecting proper knotting can lead to weak links that break easily. A hidden nuance is the use of durable, flexible silk or nylon threads combined with secure knots like the surgeon’s knot for longevity. Also, always double-knot and add a dab of jeweler’s glue for extra security—this small step can prevent premature breakage. Learn more about building trust through proper restringing here.
What Most Miss About Accurate Appraisal
Many think that appraisals are just about matching the market price. But in reality, an expert appraisal considers the item’s craftsmanship, materials, provenance, and condition. The hidden nuance is the importance of detailed documentation and photographs, which bolster your credibility and help prevent disputes. Additionally, understanding the subtle differences in gemstone quality—cut, clarity, color, and carat weight—can significantly impact valuation. For advanced insights, visit this comprehensive guide.
Why Engraving Is More Than Just Decoration
Many see engraving as simply adding initials or patterns, but the real skill lies in precision and depth control. Excessive pressure or shallow engraving can ruin the surface or make the design look unprofessional. A hidden nuance is the choice of tools—manual gravers versus rotary engravers—each offering different control levels. For intricate designs, mastering the depth and angle is crucial to avoid uneven lines or breakage. For advanced tips, explore this expert resource.
Have you ever fallen into this trap? Let me know in the comments. Remember, mastering these hidden nuances takes practice and patience, but the results will be well worth the effort.
Keeping your jewelry tools in top condition is crucial for ensuring precise and durable stone settings, restringing, or engraving work. Over time, even the best tools can wear down or become misaligned, which compromises your craftsmanship and can lead to costly mistakes. I recommend investing in high-quality equipment and establishing a regular maintenance routine to keep everything functioning smoothly.
Start with a solid set of jeweler’s loupes and magnification devices. I personally rely on a 10x optivisor, which provides a comfortable, hands-free view of tiny details—essential when aligning stones or inspecting prongs. Regularly clean your lenses with microfiber cloths and avoid harsh chemicals to prevent scratches or fogging. For more detailed inspections, a stereo microscope with adjustable magnification is invaluable. I prefer models with LED lighting, like the Olympus SZ Series, because consistent illumination helps catch imperfections early.
Regarding hand tools, a set of precision pliers—flat-nose, round-nose, and chain-nose—is indispensable. I use Swiss-made tools from Koval or Wubbers because their tips stay aligned and resist corrosion over years of use. Keep your prong pushers, burnishers, and files sharp; dull tools can slip or cause uneven finishes. I recommend periodically honing these with jewelers’ sharpening stones or replacing them when they become too worn.
For soldering, a reliable but controllable torch like the Smith Little Torch is my go-to. Its compact size offers excellent control for delicate settings, and the adjustable flame lets me fine-tune the heat without risking damage to the stones. Always use a quality flux and clean your torch tips regularly to prevent oxidation. As for fire bricks and soldering blocks, I favor fireclay bricks that can withstand high temperatures and are easy to clean—keeping your workspace efficient and safe.
When it comes to software, digital design tools like RhinoGold or MatrixGold are game-changers for planning intricate settings or custom engravings. I utilize them to visualize how a stone will sit before even touching the metal, saving time and reducing errors. These programs can also generate precise templates for casting, which minimizes adjustments during assembly.
Maintenance extends beyond tools to your workspace. Regularly wipe down your station, organize your materials, and check for loose connections or worn parts in your equipment. This proactive approach prevents unexpected breakdowns and keeps your workflow smooth. Remember, a well-maintained setup not only speeds up your work but also elevates your craftsmanship to professional standards.
Looking ahead, I believe automation and smart tools will become more integrated into jewelry-making. Devices that automatically measure tension or align stones could soon be standard, further reducing human error. However, mastering manual techniques will always remain essential for nuanced craftsmanship. I encourage you to try calibrating your prong pushers or burnishers with a micrometer—small adjustments can lead to big improvements in your results.
How do I maintain my tools over time? I recommend creating a dedicated cleaning and sharpening schedule—soaking steel tools in a mild acid bath, like vinegar, once a month can remove tarnish and prevent rust. Additionally, storing tools in protective cases or foam inserts prevents misalignment and damage. Regularly inspecting your equipment for cracks or dullness ensures consistent quality in every piece you craft.
Mastering your tools and maintaining them diligently is a fundamental step toward elevating your jewelry work. Remember, precision starts with preparation, and well-kept tools are the foundation of craftsmanship. Try implementing a routine check and cleaning protocol today, and experience how it transforms your results. For more in-depth guidance on tool maintenance, check out this detailed resource.
Lessons that Changed My Approach to Jewelry Craftsmanship
- One of the hardest lessons I learned was that rushing the setting process can lead to loose stones and costly repairs. Patience and precision are everything.
- I used to think more tension in prongs meant better security, but I realized that balanced tension prevents damage to delicate stones. Less is often more.
- Restringing with the right materials and secure knots has saved me countless headaches. Trustworthy threads and double knots make all the difference.
- Understanding gemstone quality beyond just appearance—like cut, clarity, and provenance—elevates my appraisals and builds client trust. Details matter.
Tools and Resources I Trust for Jewelry Mastery
- Olympus SZ Series Stereo Microscope — Offers excellent magnification and LED lighting, essential for inspecting tiny prongs and alignment.
- RhinoGold and MatrixGold Software — Help me visualize and plan settings accurately before working on metal, reducing errors and rework.
- Swiss Wubbers Pliers — Their durability and precision help me manipulate delicate prongs and bezels with confidence.
- “Stone Setting Techniques The Ultimate Guide” — This cornerstone resource deepens my understanding of advanced setting methods and nuances.
Embrace the Challenge and Elevate Your Craft
Mastering stone setting, restringing, appraisal, and engraving is a journey of continuous learning and patience. Every piece you create or repair builds your confidence and reputation. Don’t be afraid to experiment, learn from mistakes, and invest in quality tools and resources. Your clients will notice the difference, and your skill will evolve with each project. So, take that first step today—your future masterpieces await. How have you recently challenged yourself to improve your jewelry craftsmanship? Let me know below.