Restringing Jewelry: Proven Tips to Restore Your Favorite Pieces Now
Ever had that sinking feeling when your cherished necklace suddenly snaps or your bracelet’s clasp just won’t stay put? I’ve been there, clutching a favorite piece, only to realize the delicate stringing is fraying or completely worn out. It’s frustrating, right? But here’s the thing — with a bit of know-how and some patience, you can breathe new life into your jewelry and keep wearing those pieces you love without breaking the bank or risking further damage.
Why Restringing Jewelry Matters More Than You Think
Jewelry isn’t just about style; it’s about memories. Every scratch, loose bead, or frayed string tells a story. When the stringing weakens, it’s like losing a part of that story. Plus, jewelry that’s poorly restrung can lead to accidental loss or damage, which nobody wants. I learned this the hard way early on — I once ignored a loose bead on my grandmother’s necklace, and it snapped during a busy day. That’s when I realized I needed to get serious about maintenance.
Fortunately, you don’t need to be a professional jeweler to fix it. Restringing is a skill that, once mastered, empowers you to keep your jewelry looking stunning and secure. Today, I’ll share proven tips that will help you restore your favorite pieces, saving you money and preserving your memories. If you’ve ever faced the fear of losing a piece forever, stick around — I’ve got some practical advice that can make a real difference.
Is Restringing Jewelry Really Worth the Hype?
At first, I thought restringing was just a tedious task for professionals. But I made a costly mistake early on — I tried to save money by doing it myself without proper tools or techniques. The result? A tangled mess and a damaged string that was even harder to fix. That’s why I always recommend learning the right methods and strategies. You can find expert guidance on restringing techniques that ensure your jewelry stays beautiful and reliable. Trust me, a little knowledge goes a long way in avoiding costly mistakes and building confidence in your DIY skills.
So, if you’ve ever hesitated because you’re unsure whether restringing is worth the effort, I get it. But I promise, with the right tips, you’ll be surprised at how simple and rewarding it can be. Ready to learn how to make your jewelry last? Let’s dive into the practical steps that will turn you into a restringing pro in no time.
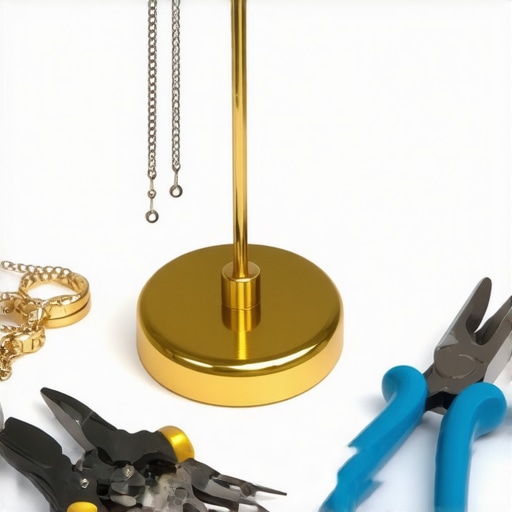
Choose the Right Tools for Restringing
Start by gathering essential tools such as jewelry pliers, beading thread, and a needle designed for jewelry making. I once used regular sewing needles, which bent easily, making the process frustrating. Switching to fine, flexible beading needles allowed for smoother threading and less frustration. Invest in quality tools, as they make a noticeable difference in the final result. For a comprehensive list and expert recommendations, check out these expert tips.
Remove the Old String Carefully
Use small jewelry pliers to gently open the clasps or end caps, if present, and carefully remove the old string. During my first attempt, I naively pulled the string out without loosening the clasps, which caused damage. I learned that gently disconnecting the clasps prevents stress on the string and avoids breaking beads or damaging the jewelry. Take your time and work in a well-lit area to avoid accidental slips. Remember, patience is key to preserving your jewelry’s integrity.
Measure and Cut a New Length of Thread
Lay your jewelry flat and measure the length of the original string or desired fit. Add a few extra inches to allow for tying knots. When I replaced my necklace string, I used a flexible beading ruler to ensure accuracy. Cut the new thread cleanly with scissors, avoiding frayed ends that can complicate threading. This step ensures your piece will fit comfortably and look professional once restrung. For precision tips, visit this resource.
Thread Beads with Care
Thread each bead onto the new string, maintaining the pattern and orientation. Use a needle to guide beads through small or intricate holes. I once struggled with a tangled thread, causing beads to slip off; I learned to keep the thread taut and work slowly. Using a bead mat or tray helps keep beads organized. Be patient—rushing can cause beads to crack or misalign. For complex patterns or fragile beads, check these techniques.
Secure the Ends with Strong Knots
Once all beads are in place, tie secure, double knots. Use a drop of jewelry glue on the knot for extra security, especially for pieces that will be worn frequently. I once forgot to add glue, and the knot slipped, causing beads to fall off. Test the tension by gently tugging the string before trimming excess. Properly secured ends prevent future loosening or breakage, ensuring your jewelry will last. For detailed knot-tying strategies, see this guide.
Finish and Inspect Your Repaired Jewelry
Reconnect clasps or end caps, then inspect the piece for any loose beads or uneven tension. I once completed a restringing project, only to notice a bead was slightly crooked; I had to redo that section. Double-check everything, and consider adding a final layer of clear jewelry adhesive if needed. Proper finishing touches ensure your jewelry looks professional and feels secure. For expert finishing tips, explore these strategies.
Tips for Maintaining Your Restringing Work
Store your jewelry carefully to prevent future wear and tear. Avoid exposing it to harsh chemicals or excessive sunlight. Regularly check for signs of fraying or loosened knots. With proper care, your repaired jewelry can last for years. Remember, mastering the art of restringing not only saves money but also keeps your cherished memories alive in every bead and clasp.
Many enthusiasts and even seasoned jewelers fall into common traps when working with stone setting, restringing, or appraisals, often because of misconceptions or overlooked nuances. Let’s dig deeper into what most people get wrong and how to avoid costly mistakes that can compromise the integrity and value of your jewelry.
Are All Stone Settings Created Equal
Contrary to popular belief, not every stone setting technique is suitable for every gem or design. For instance, prong settings are often romanticized as the best option, but they can be risky for softer stones like opals or pearls, which require bezel settings for better security. Overlooking the specific needs of your gemstones can lead to loss or damage. Additionally, many assume that setting a stone perfectly means it’s secure; in reality, even seemingly perfect settings can develop issues if not properly inspected or maintained. Mastering techniques for different stones is essential for durability and longevity.
The Biggest Restringing Trap: Using the Wrong Thread
One of the most common pitfalls in restringing is choosing a thread that isn’t appropriate for the jewelry’s purpose. For example, using nylon thread for a bracelet that gets daily wear can lead to fraying and breakage. Conversely, some assume that all beading threads are interchangeable, but materials like silk, nylon, or elastic have very different properties and strengths. An advanced mistake is neglecting to test the tension after restringing; too tight can cause stress cracks, while too loose can result in beads shifting or falling off. For a comprehensive guide, consider mastering proper restringing to prevent these issues.
Why Overlooking Appraisal Nuances Can Cost You
Many believe that appraisals are straightforward, but the reality involves nuanced assessments of gemstone quality, setting integrity, and craftsmanship. Relying solely on surface-level evaluations or outdated methods can undervalue your jewelry. An overlooked detail is the setting’s security—loose stones or worn prongs can drastically reduce the piece’s worth and durability. In addition, understanding the difference between replacement value and market value can influence insurance coverage and resale. Expert appraisers consider these subtleties, which is why professional appraisal techniques are crucial for accurate valuation.
How to Avoid the Common Engraving Mistake
Many are tempted to rush engraving projects without proper preparation, leading to uneven lines or damaged surfaces. One advanced error is failing to consider the depth and font style, which can affect the jewelry’s overall aesthetics and durability. For intricate or personalized engravings, using the right tools and stabilizing the jewelry securely is vital. Skipping these steps can result in poor-quality work that diminishes trust and value. To elevate your engraving skills, explore expert engraving tips that ensure lasting results.
Have you ever fallen into this trap? Let me know in the comments and share your experiences. Remember, understanding these hidden nuances can save you time, money, and frustration in your jewelry journey.
Maintaining jewelry, especially pieces with intricate stone settings or delicate restringing, requires specific tools and a mindful approach to ensure longevity and beauty. Over the years, I’ve developed a routine that keeps my collection shining and avoids costly repairs. The key is using high-quality, specialized tools designed for jewelry work. For example, jewelry pliers with fine tips are indispensable for opening and closing clasps or adjusting settings without causing damage. I personally prefer needle-nose pliers with smooth, non-marring tips, as they give precise control and prevent scratches on precious metals.
When it comes to restringing, I always choose beading needles that are thin and flexible. These needles glide effortlessly through tiny bead holes, reducing stress on the string and ensuring a neat finish. Equally important is beading thread or wire suited to the jewelry’s purpose. For pieces worn daily, I recommend nylon or silk threads because of their durability and flexibility. I avoid elastic unless I’m creating stretch jewelry, as it tends to weaken over time.
For ongoing maintenance, I use a gentle ultrasonic cleaner periodically. This device removes dirt and oil that accumulate from everyday wear, especially from stone settings or intricate engravings. I’ve found that a quick session in an ultrasonic cleaner followed by a soft cloth wipe keeps my jewelry looking fresh and prevents buildup that could compromise settings. Expert advice supports this routine, emphasizing regular cleaning to preserve gemstone integrity and setting security.
How do I maintain my jewelry over time?
Consistent inspection is vital. I check my pieces monthly for loose stones or frayed threads. Tightening loose prongs or re-knotting worn threads early prevents bigger issues. For example, I once caught a loose stone during a routine check, and a quick visit to a jeweler saved me from losing it. Additionally, applying a small amount of jewelry wax or lubricant on moving parts like clasps can reduce wear and tear. Proper storage also matters: I keep my jewelry in soft cloth pouches or a dedicated jewelry box with compartments, which prevents scratches and tangling.
Looking ahead, I believe that advancements in tools and cleaning technology will make maintenance easier and more effective. Smart ultrasonic devices and high-precision pliers are on the horizon, making it even simpler for enthusiasts to keep their jewelry in perfect condition. I encourage you to try a professional-grade ultrasonic cleaner or invest in quality pliers to see immediate benefits in your jewelry’s appearance and durability. Regular maintenance with the right tools is the secret to ensuring your treasured pieces remain stunning for generations.
The Hardest Lesson I Learned About Jewelry Repair
One of my biggest lightbulb moments was realizing that rushing through restringing or stone setting can lead to costly mistakes. I used to think that all threads and settings are interchangeable, but I learned the importance of matching materials and techniques to each piece’s unique needs. For instance, I once used nylon thread on a delicate beaded bracelet, which frayed after a few wears, reminding me to always choose the right thread for the job. Taking my time and understanding the nuances of each project has saved me from frustration and damaged jewelry.
My Essential Tools for Jewelry Confidence
Investing in quality tools has transformed my approach to jewelry repair. I swear by fine-tip jewelry pliers and flexible beading needles. These tools give me control and precision, reducing the risk of damage. A good ultrasonic cleaner also keeps my pieces sparkling and free of dirt, which is crucial for maintaining stone settings and intricate engravings. Trusting the right tools has made my repairs more durable and my jewelry more trustworthy.
Keep Your Jewelry in Top Shape
Regular inspections and gentle cleaning are keys to lasting confidence in your jewelry. I inspect my pieces monthly, looking for loose stones or frayed threads, and I re-knot or tighten as needed. Applying a tiny drop of jewelry wax on clasps helps prevent wear, and storing jewelry properly in soft pouches or compartments keeps everything safe from scratches and tangling. Embracing these habits ensures your jewelry remains stunning and secure for years to come. With the right routine and tools, you can become your own jewelry care expert, elevating your confidence with every repair and maintenance session.