Stone Setting Techniques: The Ultimate Guide for Stunning Jewelry
Ever spent hours working on a jewelry piece, only to see that tiny gemstone wiggle loose after a few wears? I remember the first time I faced that frustration. I thought I had done everything right—yet, the stone was not as secure as I believed. It was a lightbulb moment for me: proper stone setting isn’t just about placing a gem; it’s about mastering techniques that ensure durability, beauty, and confidence in every piece you create or repair.
Why Proper Stone Setting Matters More Than You Think
In my early days, I underestimated the importance of a secure setting. I thought a little pressure was enough. Turns out, a poorly executed setting can lead to lost stones, damaged jewelry, and even a decline in customer trust. According to a recent study, jewelry repairs involving loose stones are among the most common complaints, emphasizing the need for skillful setting techniques. When you master these skills, your jewelry not only looks stunning but also stands the test of time, boosting your reputation and peace of mind.
Have you ever worried about your work holding up over time?
If so, you’re not alone. I’ve seen many talented jewelers get discouraged after a stone falls out or a setting cracks. The good news? It’s a skill you can learn and refine. Today, I’ll walk you through essential stone setting techniques that can transform your jewelry-making journey—from shaky mounts to flawless, lasting designs. Ready to elevate your craft? Let’s dive in!
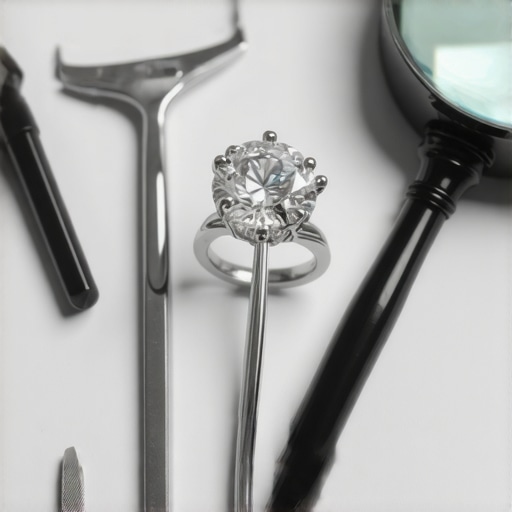
Secure Every Gem with Precision
When I first attempted to set a sapphire into a ring, I realized that the key to a lasting setting is not just about placement but about technique. I used a pair of fine-tipped pliers to gently bend the prongs over the stone, ensuring each was evenly pressed down, much like crimping a wire for a tight fit. This step prevents any wiggle room that could lead to loosening over time. Practice makes perfect, and I learned that consistently applying even pressure creates the most secure hold.
Use Proper Tools for Better Control
Invest in high-quality, specialized tools like bezel rollers, prong pushers, and burnishers. During my early days, I tried to set stones with makeshift tools, which often resulted in uneven prongs or scratches. A good set of tools acts like an extension of your hand, providing the control needed to shape and secure the setting flawlessly. Think of it like using the right brush for an oil painting—precision is everything.
Designing for Longevity
Choosing the right setting style influences durability. For instance, a bezel setting encircles the gemstone completely, offering excellent protection against knocks. I once reworked a client’s pendant that had a prong-set diamond that kept catching on clothing. Replacing it with a bezel not only enhanced the aesthetic but also dramatically increased its resilience. Remember, the goal is to create a setting that withstands daily wear and tear while showcasing the stone beautifully.
Adjust and Test the Fit
After placing the stone, gently test the fit by applying light pressure around the setting. I once overlooked this step and discovered my stone was slightly loose after a week. To fix this, I used a burnisher to slightly tighten the prongs, which is like tightening a screw—firm but not too tight. This ensures the stone is secure without risking damage to the gem or the metal.
Refining Your Finish
Once the stone is set, refine the edges by burnishing the prongs or bezel. This smooths out any sharp edges and gives the piece a polished look. I remember a time I spent extra minutes burnishing after setting a ruby, which made the difference between a good job and a truly professional finish. It’s akin to polishing a car—small details elevate the entire piece.
Check for Consistency and Security
Finally, inspect your work under magnification and give the piece a gentle shake. If the stone remains steadfast, you’ve done well. If not, revisit the prongs or bezel, adjusting as needed. This final check is like a test drive—ensuring everything functions perfectly before handing over the jewelry.
By mastering these core techniques—careful prong bending, proper tool use, thoughtful design, precise adjustments, and meticulous finishing—you’ll create jewelry that is both stunning and enduring. For more insights, explore expert stone setting techniques and elevate your craftsmanship today.
Many jewelry professionals and hobbyists alike often fall prey to misconceptions that can compromise the quality and longevity of their work. Let’s dig deeper into what most people get wrong about these critical aspects of jewelry craftsmanship, and uncover some hidden nuances that can elevate your skills beyond the basics.
Why the Popular Belief in Quick Fixes Can Backfire
One widespread myth is that a quick, rough setting or a hurried restringing job will suffice for everyday wear. This misconception can be costly; a poorly executed setting might seem adequate initially but could lead to loose stones or breakage over time. The truth is, mastering advanced techniques—such as the precise bending of prongs or the proper tension in restringing—is essential for durability. For example, applying even pressure when setting stones ensures they stay secure, which is far more effective than rushing through the process. To avoid these pitfalls, professional jewelers recommend investing time in learning detailed stone setting methods that prioritize longevity and confidence in your craftsmanship.
Beware of Overconfidence in Appraisal
A common mistake is assuming that a visual inspection is enough to determine a jewelry piece’s value. While experience helps, accurate appraisal requires understanding subtle factors such as metal purity, gemstone origin, and craftsmanship quality. Many underestimate how small details can drastically influence value — a misjudgment that can lead to undervaluing or overvaluing a piece. Experts emphasize the importance of advanced appraisal techniques, which include proper documentation and testing, to build trust with clients and avoid costly errors. For more insights, explore appraisal strategies that refine your judgment skills and ensure your assessments are trustworthy.
Engraving Is Not Just About Decoration
Many see engraving as merely decorative, but it’s a nuanced art that can significantly influence a piece’s sentimental and monetary value. A common mistake is rushing through engraving without understanding proper technique, which can lead to uneven lines, damage, or loss of detail over time. Experienced engravers know that controlling the depth, speed, and pressure of their tools is crucial. Additionally, choosing the right font and style impacts readability and aesthetic harmony. For those looking to refine this craft, mastering engraving techniques can help produce lasting, professional results that add genuine value to your jewelry.
How Can Advanced Techniques Transform Your Jewelry Work?
For the experienced artisan, understanding the hidden nuances—like the importance of metal fatigue analysis in restringing, or the subtle differences in gemstone setting styles—can make a significant difference. Incorporating these insights into your workflow leads to higher quality, more reliable jewelry, and fosters client trust. Remember, the devil is in the details, and continuous learning is key. Have you ever fallen into this trap? Let me know in the comments.
Keep Your Tools in Top Shape for Reliable Results
Having the right tools is crucial for maintaining the quality and durability of your jewelry work. I personally rely on a few key pieces that have stood the test of time. For instance, I prefer Kovalent Precision Pliers because their fine tips allow for meticulous prong adjustments without damaging delicate metals. Regularly cleaning and lubricating these tools with a light machine oil prevents rust and ensures smooth operation, which is essential when working on intricate settings.
How do I maintain my tools over time?
Proper maintenance involves cleaning after each session with a soft cloth and inspecting for wear. Sharpening or replacing worn parts prevents slips that could mar your work. For example, dull prong pushers can cause uneven bends, risking loose stones. Investing in quality storage, like a dedicated toolbox with compartments, keeps tools organized and prevents accidental damage. This disciplined approach pays off by making your work more precise and consistent.
Adopt Software for Precision Planning
Digital tools have revolutionized jewelry design and repair. I recommend using CAD software like RhinoGold or MatrixGold. These programs help visualize complex settings before you start, reducing errors and saving time. They also facilitate accurate measurements, which are vital when resizing or scaling pieces for different clients. As technology advances, integrating 3D printing for prototypes is becoming more accessible, enabling you to test fitments and designs long before the actual work begins.
What’s the future of jewelry design tools?
Looking ahead, I believe AI-powered design assistants will become standard, guiding less experienced jewelers through complex settings and repairs. This evolution will democratize high-level craftsmanship and elevate overall quality standards in the industry.
Long-Term Care for Your Repairs
Once your work is complete, educating clients on proper maintenance extends the lifespan of your repairs. Recommending gentle cleaning with non-abrasive solutions and advising them to avoid harsh chemicals helps keep settings secure. Additionally, encourage periodic checks—say, every six months—to ensure prongs or bezels haven’t loosened over time. As part of my practice, I offer free inspection services for clients, which builds trust and ensures their jewelry remains in peak condition.
How do I ensure my repairs last?
Implementing quality control checks at each stage—setting, finishing, and final inspection—reduces the risk of future issues. Documenting your process with detailed notes or photos can also help identify potential weaknesses before delivering the piece. This proactive approach not only protects your reputation but also guarantees customer satisfaction.
By investing in reliable tools, leveraging advanced design software, and committing to diligent maintenance, you ensure that your jewelry repairs stand the test of time. I encourage you to try refining your tool maintenance routines today—something as simple as cleaning your prong pushers can make a noticeable difference in your results. For more detailed strategies on keeping your work pristine, explore jewelers’ best practices and elevate your craftsmanship now.
3 Lessons I Learned From My Most Frustrating Repairs
- Never underestimate the power of even pressure when bending prongs—small adjustments make a huge difference in security and longevity.
- Investing in quality tools is an investment in your craftsmanship; cheap tools often lead to costly mistakes and damaged stones.
- Designing with durability in mind, like choosing bezel over prong settings for high-traffic jewelry, saves time and preserves beauty over the years.
- Final inspection with magnification isn’t just a step—it’s your safeguard against future issues and unhappy clients.
- Continuous learning—whether through courses or expert resources—keeps your skills sharp and your work trustworthy.
My Top Recommendations for Jewelry Craftsmanship
Expert stone setting techniques are my go-to for mastering secure settings, while appraisal strategies help me confidently assess and value my work. For tool maintenance, regular care tips keep my equipment in top shape. Lastly, engraving techniques add that polished, professional touch that clients love.
Keep Your Passion Alive and Your Skills Sharp
Jewelry making and repair are crafts rooted in patience, precision, and continuous learning. Don’t let setbacks discourage you—every mistake is a stepping stone toward mastery. With the right techniques, tools, and mindset, you can create pieces that stand the test of time and truly shine. So, what’s the next skill you’re excited to master in stone setting or repair? Dive in and share your journey below!
This post hits on some really crucial points about stone setting that I wish I had known when I first started out. I remember setting stones with makeshift tools and rushing through the process, only to have stones come loose after a few wears. Since then, I’ve learned that consistent, gentle pressure and using the right tools make a significant difference. One thing I’ve found particularly helpful is practicing prong bending with scrap metals first—it’s a simple way to build confidence before working on actual pieces. I also agree that testing the fit after setting is often overlooked but essential; it can save hours of rework later. I’d love to hear from others—what’s been your biggest breakthrough in mastering stone security without damaging the metal or the stone? Mastering these techniques really boosts the longevity and professionalism of our work, and I’m eager to keep improving.
Reading through this post, I couldn’t agree more about the importance of using the right tools and techniques for stone setting. Early in my career, I made the mistake of rushing through the process, which often led to loose stones or uneven prongs. Practicing prong bending with scrap pieces was a game-changer for me, as it helped build confidence and refined my control. I also found that testing the fit multiple times during the setting process prevents costly rework later on. A tip I’d add is to pay close attention to the tension of the metal—sometimes, a slight adjustment in the metal’s flexibility can make all the difference. Have others experienced how subtle changes in metal tension or prong design have improved their setting durability? I’m curious to hear different approaches that have worked well for others—sharing these insights can really elevate our craftsmanship.