Restringing Jewelry: Proven Methods to Restore Shine & Confidence
It was late afternoon, and I reached into my jewelry box, fingers trembling slightly, only to discover a cherished necklace had lost its luster. The once vibrant strand now looked dull, with a stubborn knot that wouldn’t budge. That moment hit me hard—realizing that a simple piece I wore every day had become a symbol of neglect. I knew I had to find a better way to keep my jewelry shining, not just for aesthetics but for the confidence it gave me.
Why Restringing Jewelry Can Make All the Difference
Many of us overlook the importance of proper restringing techniques until a piece starts to lose its sparkle or, worse, breaks unexpectedly. Restringing isn’t just about fixing a necklace—it’s about preserving memories, personal style, and that undeniable confidence that comes from wearing something beautiful and well-maintained.
Over the years, I’ve learned that restoring your jewelry’s shine involves more than just rethreading beads; it requires proven methods and attention to detail. If you’re like I was, you might have tried quick fixes or rushed through the process, only to be disappointed. Let me tell you, with the right approach, you can revive your favorite pieces and keep their beauty intact. For expert insights, I recommend exploring [this comprehensive guide on proven restringing techniques](https://jewelcarecenter.com/restringing-jewelry-proven-techniques-to-restore-shine-confidence), which helped me understand the importance of quality materials and careful handling.
Do you often find yourself frustrated with jewelry that no longer looks or feels the way it did? If so, you’re not alone. Addressing these issues head-on can prevent further damage and prolong the life of your treasured accessories. In the next sections, I’ll walk you through essential steps to master the art of restringing—so you can confidently restore your jewelry without costly repairs or replacements.
Prepare Your Workspace and Tools for Success
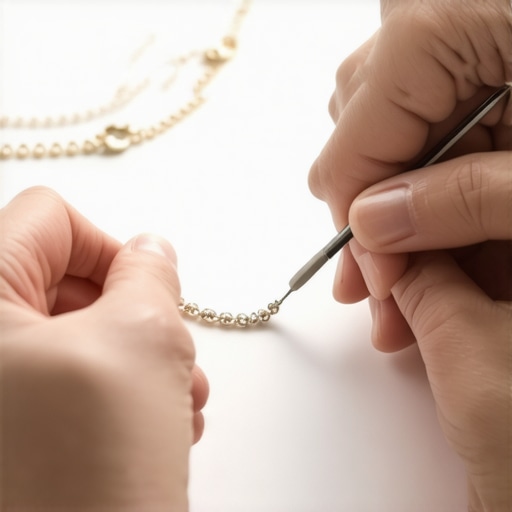
Start by clearing a well-lit, clean area with a sturdy surface to work on. Gather essential tools—sharp scissors, fine-tipped pliers, a needle-nose applicator, and quality beading thread or wire. As I once learned when reassembling a delicate pearl necklace, having an organized space prevents loss and damage, ensuring precision throughout the process.
Select the Right Materials for Your Jewelry Type
Choosing appropriate thread, wire, and clasps is critical. For fragile beads or pearls, opt for silk or nylon thread; for heavier pieces, use stainless steel wire. Think of it like choosing the right foundation: using the wrong one can lead to cracks or breakage. When I repaired a vintage bracelet, switching to a sturdier wire saved it from imminent failure, giving it a new lease on life.
Undertake Careful Disassembly to Access Damaged Parts
Carefully remove the clasp or knot the strands at both ends. Use fine pliers to gently open jump rings or unclasp the piece. Remember, patience is key—rushing can worsen damage. I once disassembled a tangled beaded necklace, and delicate handling prevented bead loss, allowing me to clean and restring it properly.
Master the Knotting Techniques for Safety and Aesthetics
Proper knotting not only secures beads but also adds flexibility and durability. For stringing, I prefer the square knot for its reliability. When restringing a gemstone chain, I practiced the single knot, ensuring each bead was snug and centered. Practice makes perfect; I once had to redo a knot multiple times, but the result was a smooth, professional finish that boosted my confidence.
Implement Secure and Invisible Attachments
Attach clasps with crimp beads or jump rings, ensuring they’re firmly closed. Use a crimping plier to flatten crimps securely without damaging the wire. In my experience, a well-attached clasp makes all the difference—like the difference between a necklace that stays put and one that keeps slipping off. To enhance durability, I periodically double-check every attachment during assembly.
Revive Stones with Proper Setting and Cleaning Methods
Clean stones gently with a soft cloth and, if needed, mild soap—never abrasive cleaners. For damaged settings, I consult detailed guides like this expert stone setting guide to re-secure loose stones. A secure setting protects your stones from falling out and maintains the piece’s overall integrity. Remember, a little effort here can prevent costly repairs later.
Ensure the Final Finish Looks Seamless and Professional
Trim excess thread or wire carefully, then hide knots by sliding them into beads or under crimps. Apply a tiny drop of jewelry glue if necessary for extra security. I once finished restringing an heirloom necklace, and the finishing touches made it look factory-new. Your patience during this step guarantees your piece looks stunning and lasts for years.
When it comes to jewelry craftsmanship, many believe they understand the basics, but beneath the surface lie subtle nuances that can make or break the longevity and beauty of your pieces. Let’s dig deeper into what most people get wrong about restringing, engraving, appraisal, and stone setting, and how these myths can lead to costly mistakes.
One prevalent misconception is that all restringing methods are equally effective. In reality, the choice of materials and techniques can drastically influence durability. For example, many assume that nylon thread suffices for all beads, but fragile stones or vintage beads demand silk or specialized wires to prevent damage. Advanced restringing involves understanding these nuances, which you can explore further in this expert guide on proven techniques.
A common trap is believing engraving is merely about aesthetics. Many overlook that the quality of engraving directly impacts the piece’s value and personalization longevity. Amateur engravings often wear out quickly or cause structural weaknesses. Precision and expert techniques are crucial, and for a deeper dive, see this comprehensive engraving guide.
When it comes to appraisals, there’s a dangerous myth that a quick estimate suffices. In truth, accurate appraisal demands a detailed assessment of materials, craftsmanship, and market trends. Relying on superficial evaluations can undervalue or overvalue jewelry, affecting trust and investment. For the right approach, consult these expert appraisal strategies.
The trickiest area is stone setting; many assume that a loose stone is merely a repair issue. However, improper setting techniques compromise the entire piece’s integrity and safety. Advanced stone setting requires understanding different techniques suited for various stones and settings to ensure durability and aesthetic appeal. Learn more at this ultimate guide to stone setting.
### How do skilled craftsmen master these subtle differences? Let’s explore.
The key lies in attention to detail, understanding that each technique and material choice carries implications beyond the obvious. For instance, in [restringing or engraving](https://jewelcarecenter.com/restringing-engraving-secrets-to-enhance-jewelry-trust-in-2024), precision and quality materials are paramount for lasting confidence. Cutting corners to save time or cost often leads to failure, so investing in expert knowledge is crucial.
Remember, these hidden nuances often determine whether your jewelry endures the test of time or falls apart unexpectedly. Have you ever fallen into this trap? Let me know in the comments. Mastering these details transforms your approach from casual hobbyist to true artisan, ensuring your jewelry remains as stunning and trustworthy as the day you first wore it.
Maintaining your jewelry’s integrity over the years requires the right tools and a disciplined approach. Personally, I rely on a combination of high-quality equipment and meticulous methods to ensure that each piece I restore or customize stands the test of time. Investing in professional-grade tools may seem daunting initially, but their precision and durability pay off during every repair or enhancement.
How do I keep my jewelry maintenance routine effective over time?
One of my favorite tools is a set of precision pliers. I prefer chain nose and round nose pliers from Wubbers because their ergonomic handles reduce fatigue, and their fine tips allow for delicate maneuvers when opening jump rings or adjusting wire loops. I’ve found that cheaper alternatives often deform or lose grip after just a few uses, which complicates repairs and risks damaging delicate components.
For cleaning and polishing, I swear by a Dremel rotary tool fitted with soft polishing wheels. It enables meticulous cleaning of stones and metal surfaces, restoring their shine without being abrasive. I also keep a microfiber polishing cloth on hand for finishing touches, especially after applying a tiny drop of laser-safe jewelry adhesive like this trusted adhesive for setting gemstones securely.
For professional-quality stringing, I prefer beading needles with fine, flexible shafts. I opt for the John James E-Z Twist needles—they’re reliable during intricate threading through tiny bead holes, reducing the risk of breakage. Using the right needle size ensures the thread lays flat and secure, preventing future knotting issues or breakage. When restringing vintage pieces, I always choose a durable nylon fored from Beadalon because it offers flexibility and longevity, which is critical for pieces worn daily.
Keeping a jewelry anvil and a set of small hammers within reach is vital for reshaping or reattaching worn components. I regularly use a Wald or stylus to manipulate tight settings or refine designs. Having these tools on hand means I can make precise adjustments without risking damage to the jewelry’s surface or stone settings.
In terms of software, I utilize specialized CAD programs like MatrixGold when designing custom engravings or setting plans, ensuring accuracy before physical work begins. This digital planning step minimizes costly mistakes and accelerates the process.
My advice is to regularly evaluate and upgrade your toolkit, as newer, more efficient tools can substantially improve your results. Remember, even the best artisans continually refine their equipment to enhance craftsmanship quality. For example, mastering proven restringing techniques with the right tools can dramatically extend the lifespan of your jewelry pieces.
Try integrating one of these tools into your next repair session, and notice how it elevates your craftsmanship. Precision pliers or a high-quality beading needle could be the game-changer you need to make your jewelry last longer and look better.
Unspoken Lessons from the Workshop Floor
Over time, I realized that rushing through restringing or engraving often leads to mistakes that are costly and tedious to fix. Taking the time to understand the nuances—like the importance of choosing the right thread for antique beads—has saved me hours of rework and restored my confidence. Sometimes, the most overlooked detail, such as the type of crimp bead, can make or break the durability of a piece. These insights didn’t come from formal training alone but from hands-on experience and asking seasoned artisans about their secrets.
How Small Adjustments Make a Big Difference
Switching from basic tools to precision pliers or high-quality beading needles transformed my craftsmanship. These simple upgrades allowed me to handle delicate stones and intricate knots with finesse. For example, sliding a tiny knot into a bead’s lumen might seem trivial, but it ensures a seamless finish that buyers and wearers appreciate. I’ve learned to appreciate that the tiniest tweak—like reinforcing a setting with a quick bead of jewelry glue—can significantly increase a piece’s lifespan and my own satisfaction with my work.
Curated Gems for Jewelry Enthusiasts
One resource I rely on heavily is this guide on proven restringing techniques. It offers detailed insights into choosing materials and mastering knotting methods, which have elevated my skills exponentially. Additionally, this comprehensive guide on engraving and customization helped me personalize pieces effectively, boosting their sentimental and monetary value. For expert tips on stone setting, I turn to this ultimate resource, which demystifies complex techniques without overwhelming the learner.
Take Action and Elevate Your Jewelry Game
Your journey toward mastering jewelry repairs and enhancements can profoundly impact how your pieces look and last. No matter your experience level, embracing these lessons will turn craftsmanship from a necessity into an art. Remember, the real magic lies in caring for the tiniest details—those subtle adjustments and choices that create stunning, durable jewelry. So, are you ready to dive deeper and refine your skills? The next masterpiece could be just a tool or technique away.
What’s one specific step in restringing, engraving, or setting stones that you find most challenging? Share your experiences below, and let’s grow together.